
An interesting commission for lamp shades that turned out to be more difficult than I thought.


An interesting commission for lamp shades that turned out to be more difficult than I thought.
01 – The initial design and two of the cardboard templates used to mark out the plywood.
02 – Marking out and bandsawing the half rings.
03 – Cutting through a pile for one layer. The half rings are seen in the background. I was cutting for ten lamps at a time.
04 – Careful cutting with the table on the bandsaw tilted would mean less work on the lathe later.
05 – One level of half rings glued up. Three more waiting.
06 – Gluing up the initial levels before they are put on the lathe and cleaned on the inside.
07 – The initial portion of the lamps ready for another layer.
08 – Gluing on the next layer.
09 – The lamps are growing nicely.
10 – More rings, more glue–ups, more inside cleaning on the lathe.
11 – More than half way. Things are going well.
12 – Final glue-ups. Have to use larger clamps now.
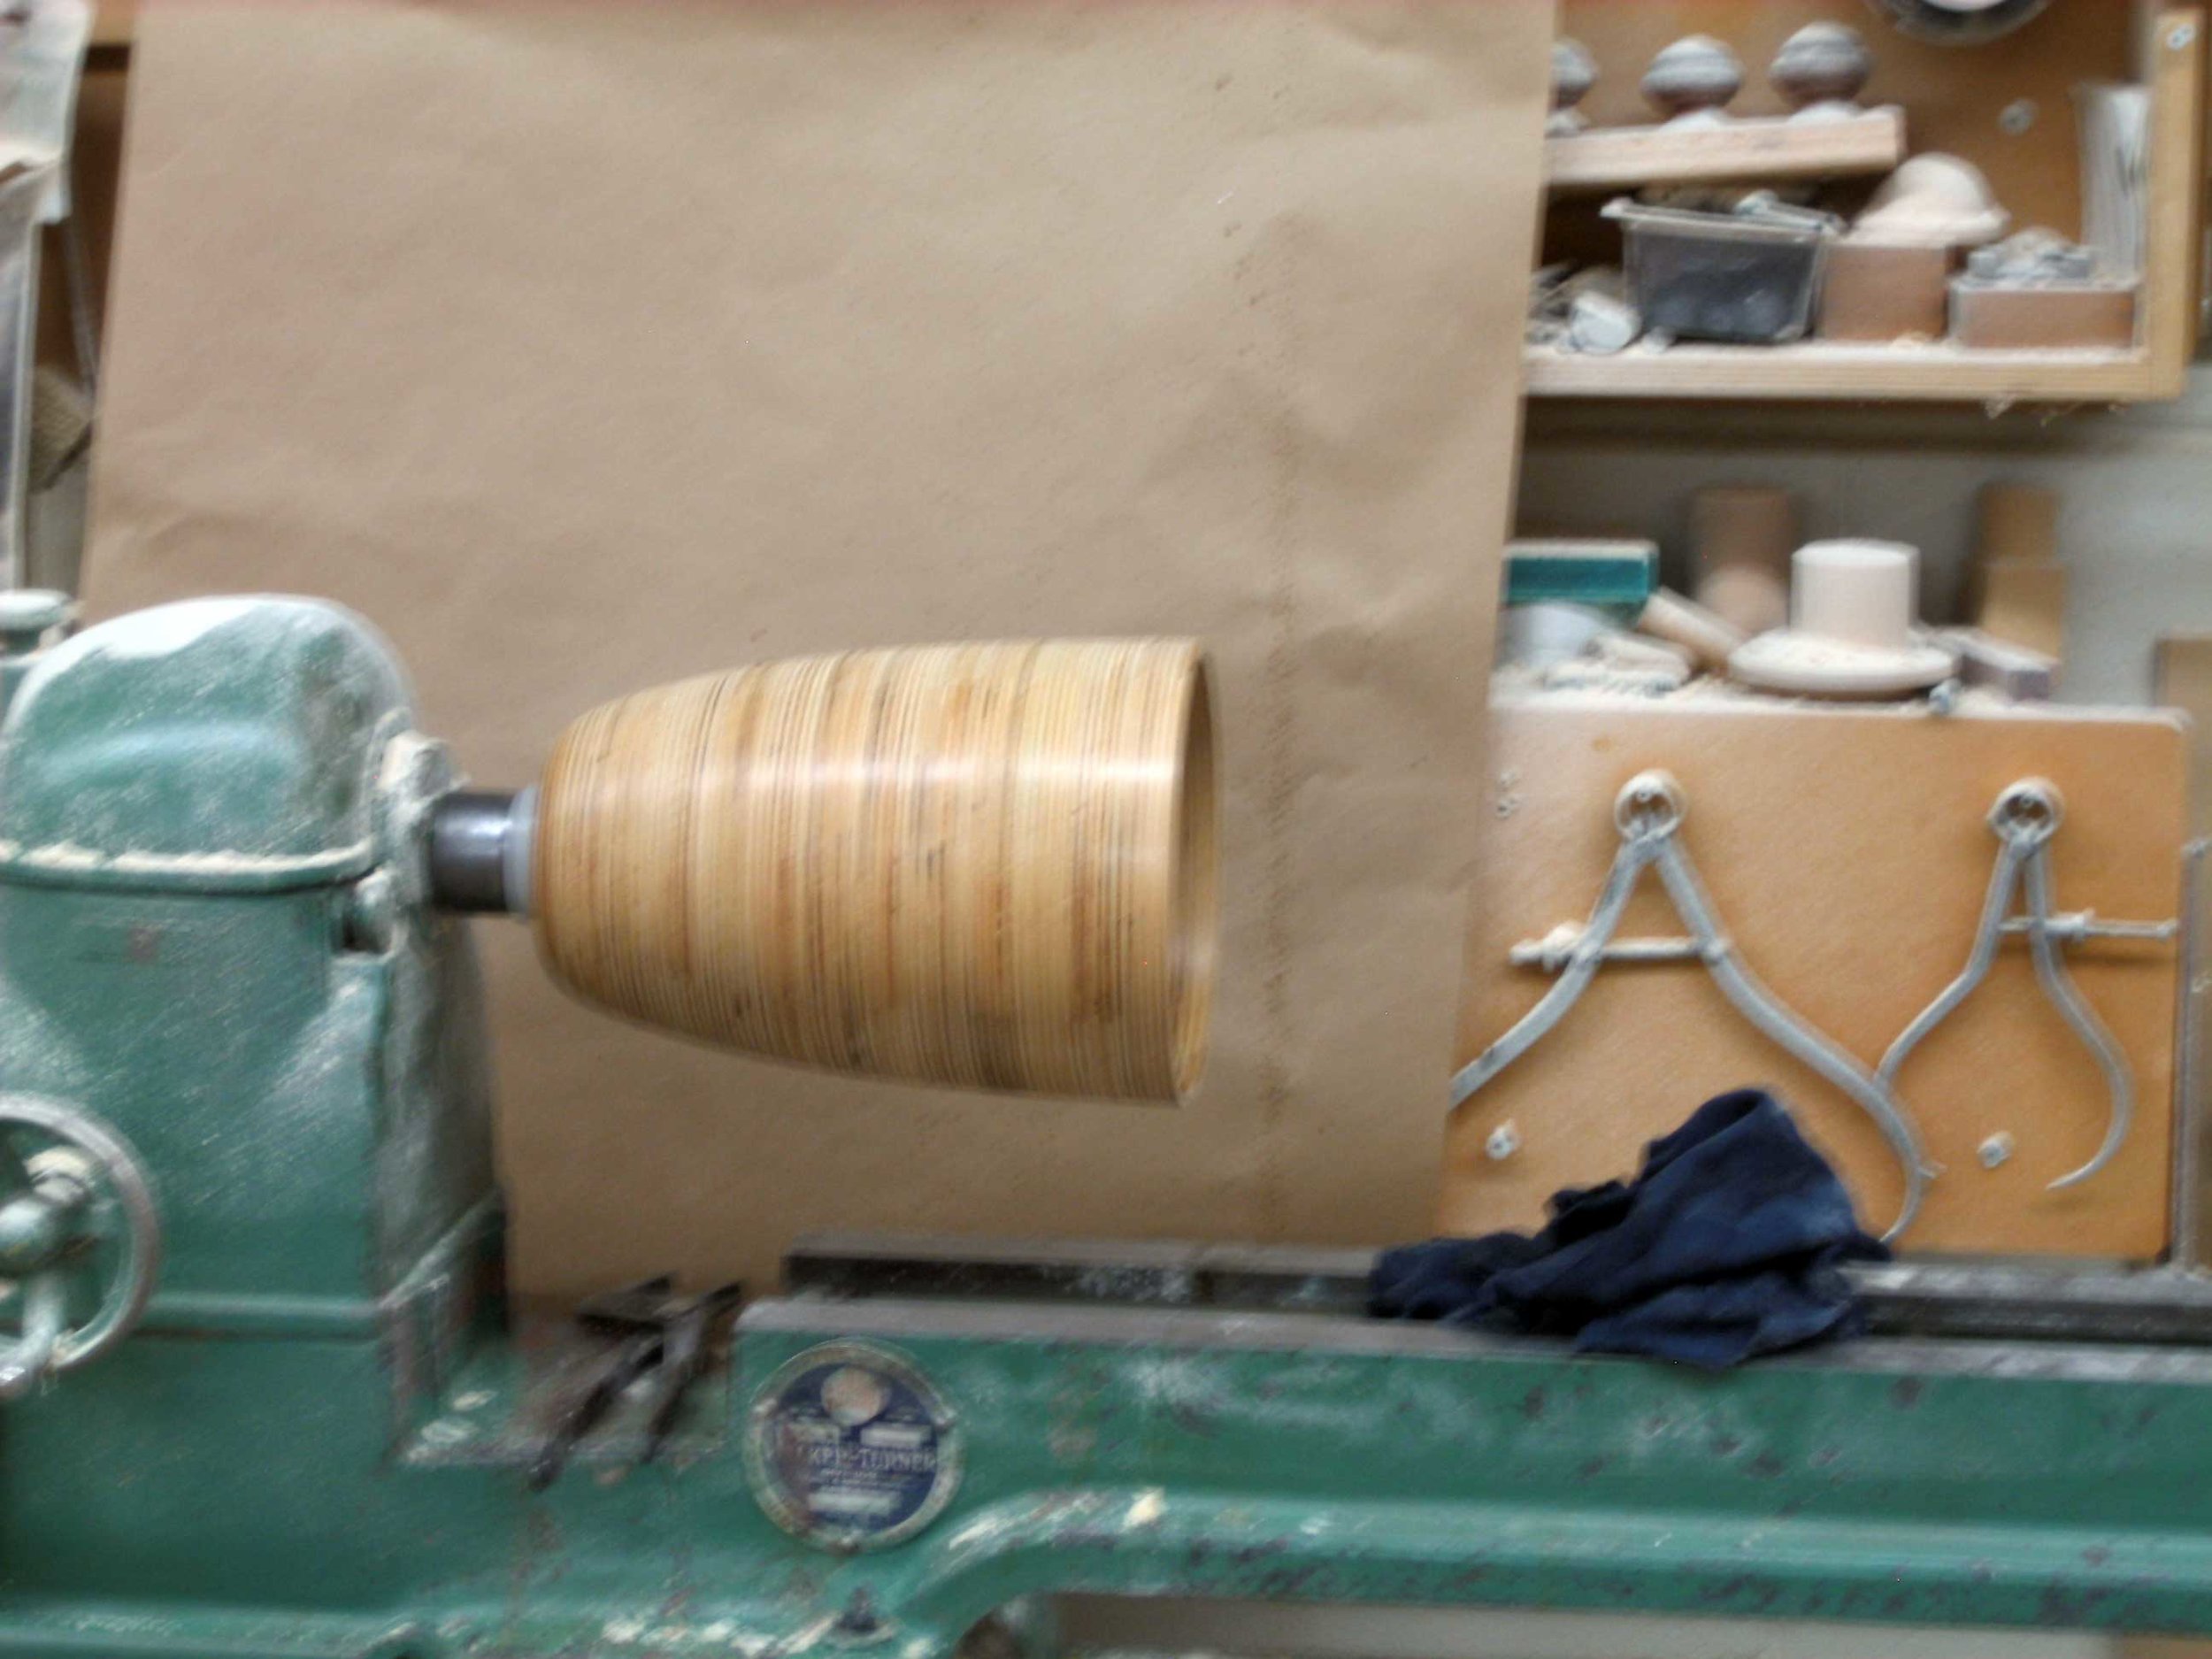
13 – A plug on the end allows me to clean the outside of the lamp all at one time.
14 – The plug removed for a clearer view. The wall thickness is under a quarter inch and uniform.
15 – Applying a wipe-on finish.
16 – Wet sanding on the lathe. A bit messy.
17 – Wrapping for transport so the first ten can be installed.
18 – The lamps can be tested while the kitchen is being refurbished in stages.
19 – Different types of bulbs produce different effects. Who would have guessed?