
A commission for a walnut kitchen table with a glass top.


A commission for a walnut kitchen table with a glass top.
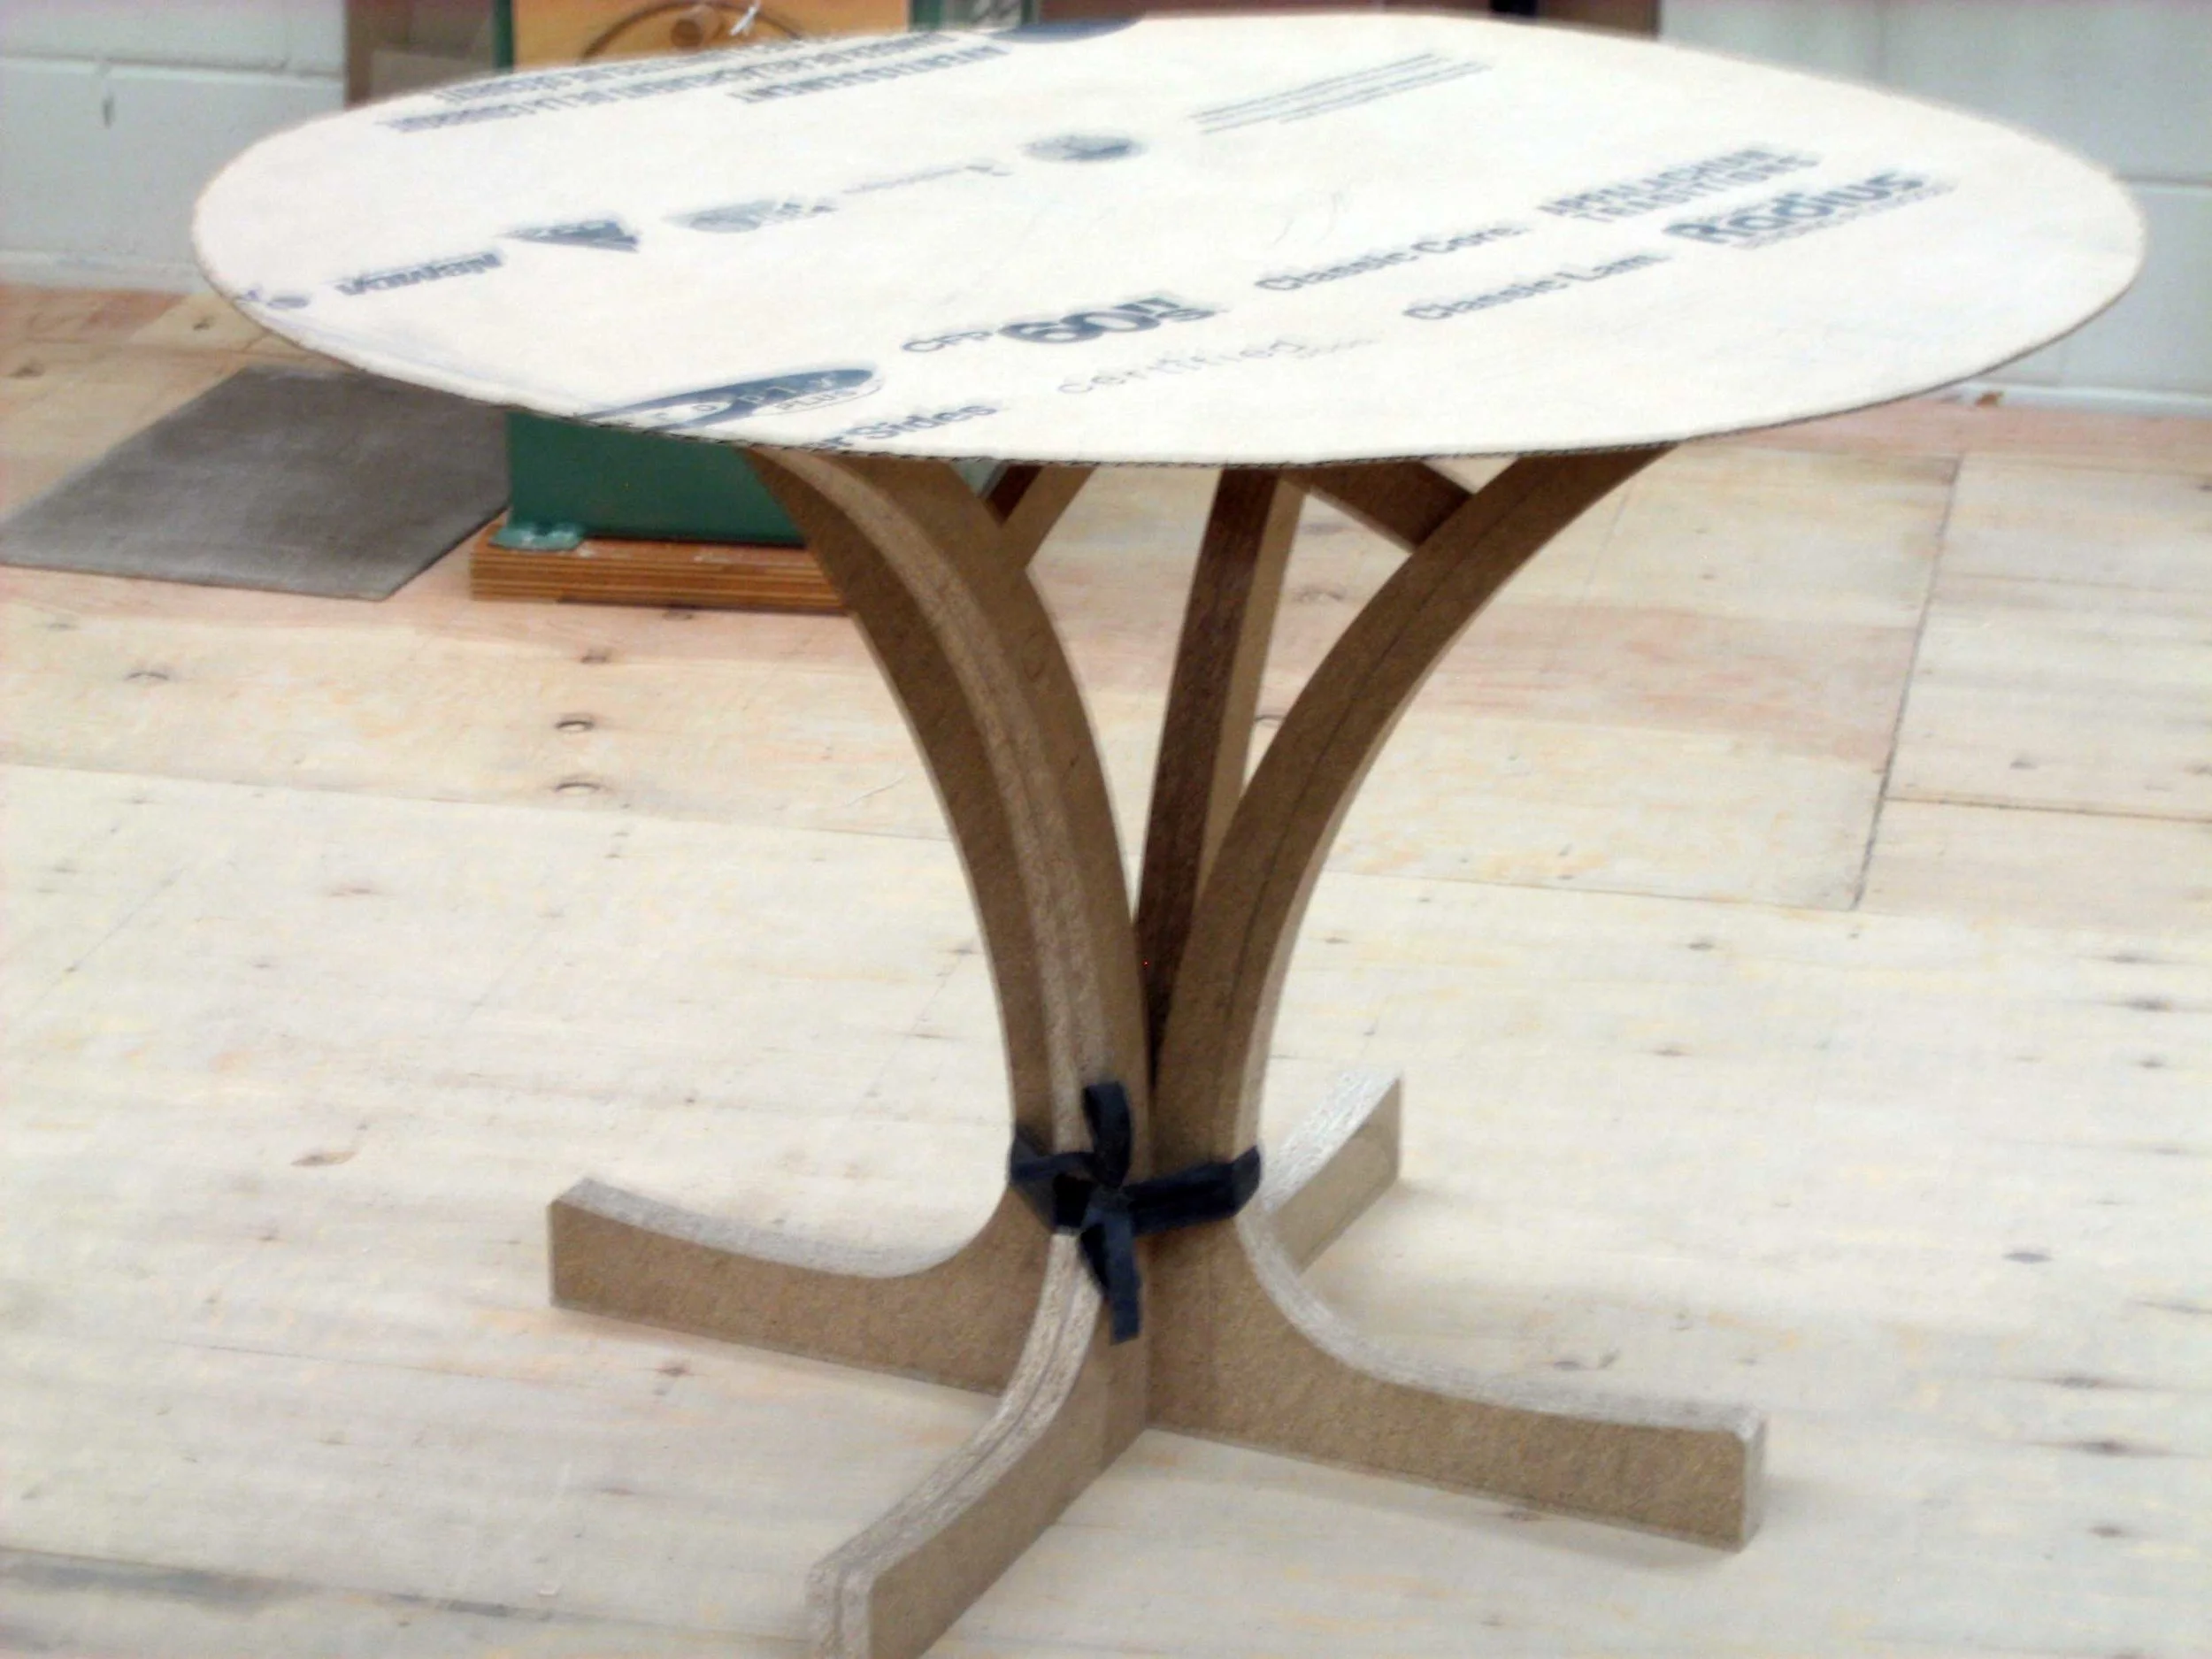
01 – A mock up for the client who has trouble making decisions using drawings alone. The legs are held together with a strip from a tire intertube.
02 – The segmented walnut ring. It was tough finding good walnut so the pieces had to be chosen and arranged carefully.
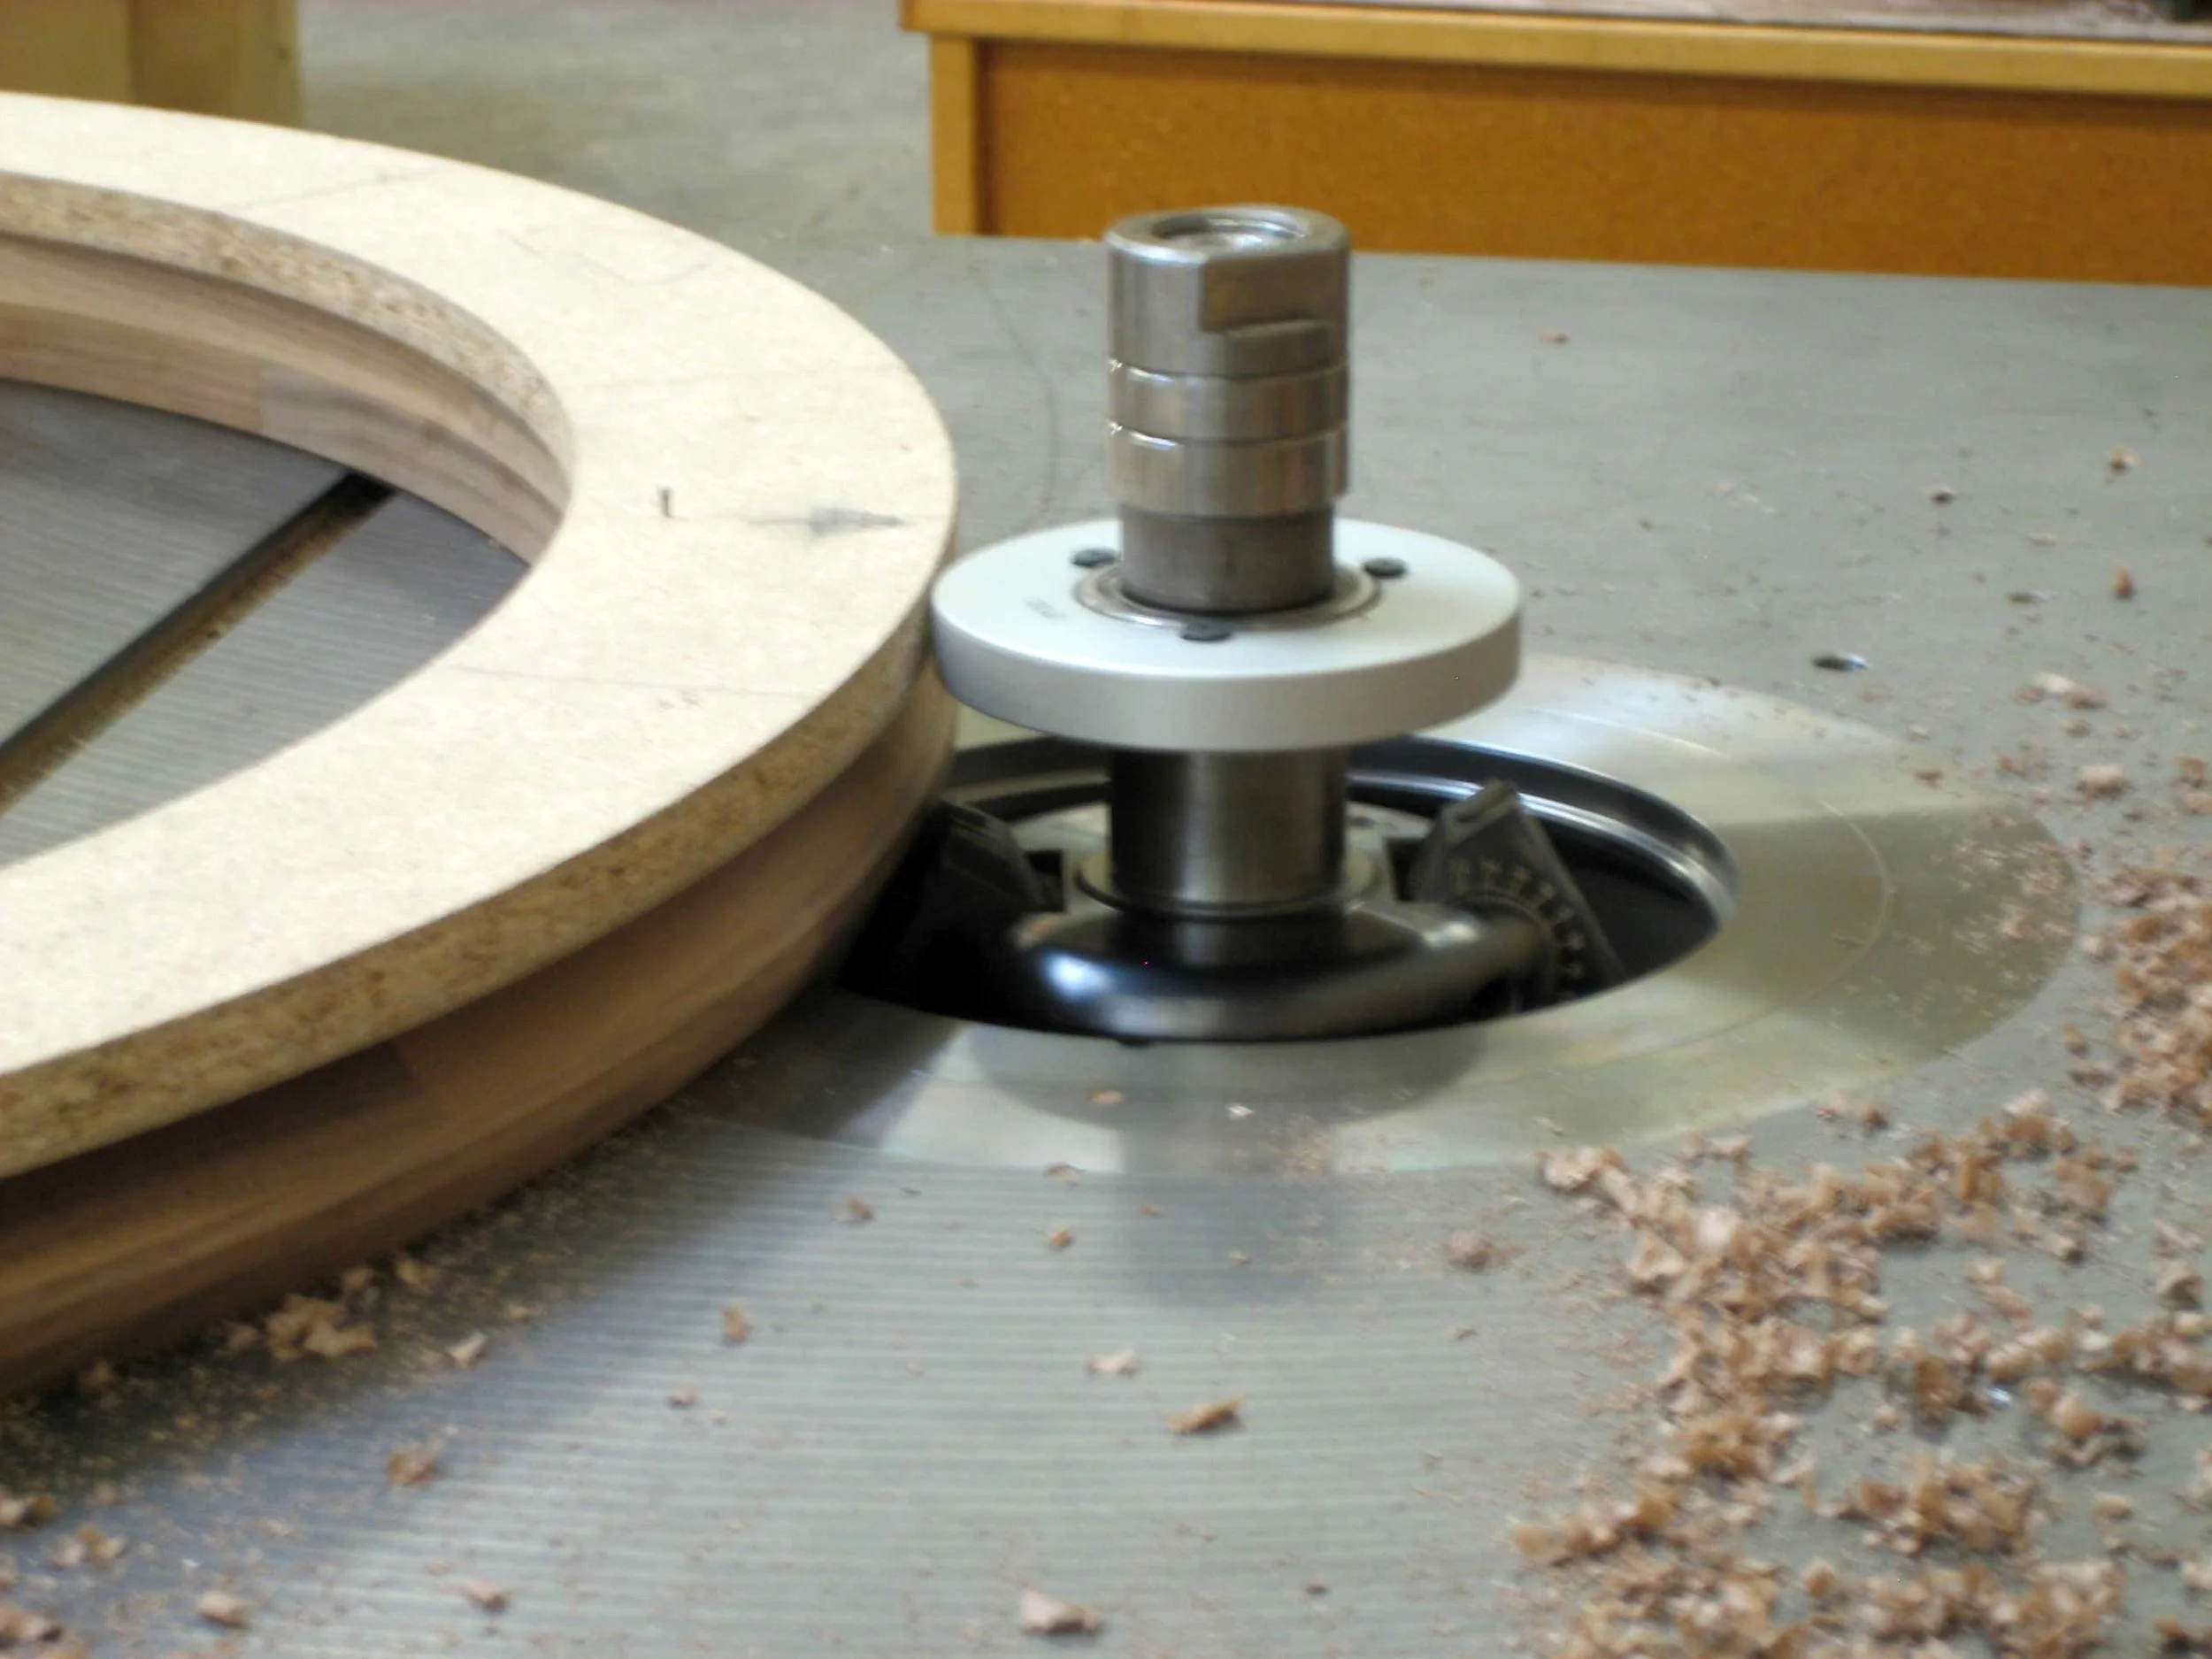
03 – Undercutting the edge on the shaper. The pattern is separated from the top by small blocks.
04 – Gluing up one leg and a portion of the feet.
05 – Tapered laminated legs.
07 – The legs are morticed and the tenons on the feet are cut to fit.
08 – Gluing the foot section to the leg.
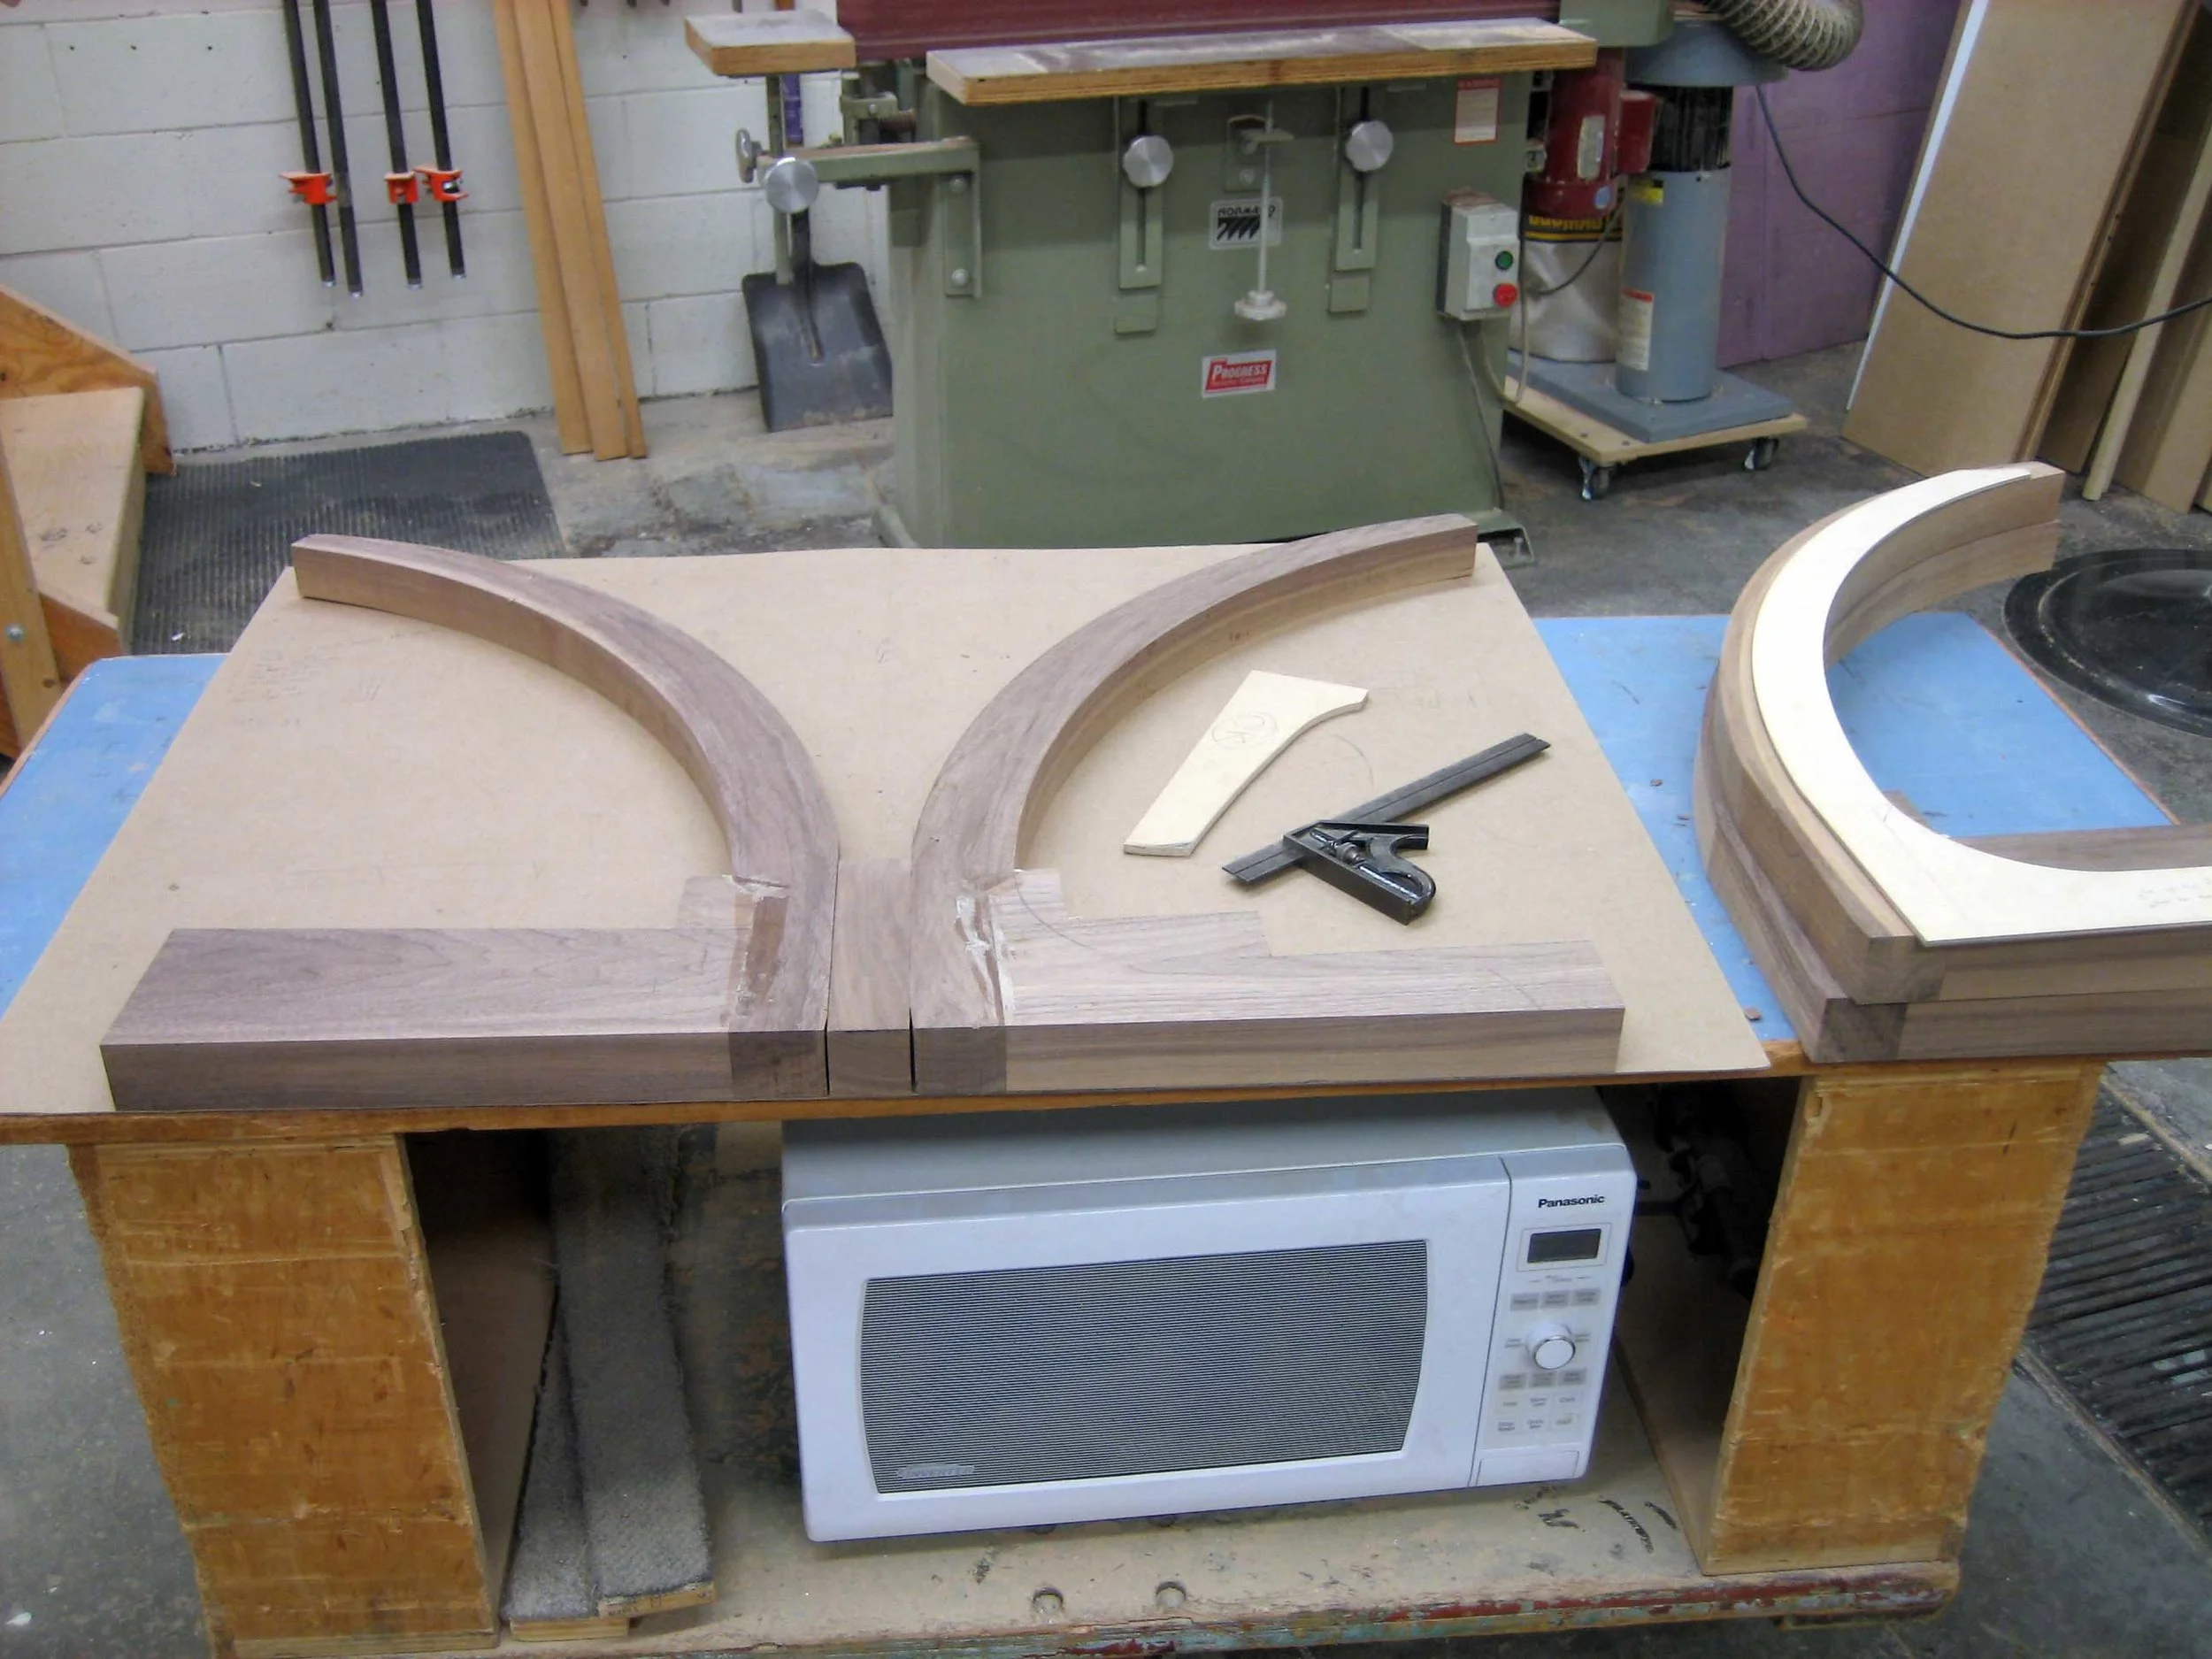
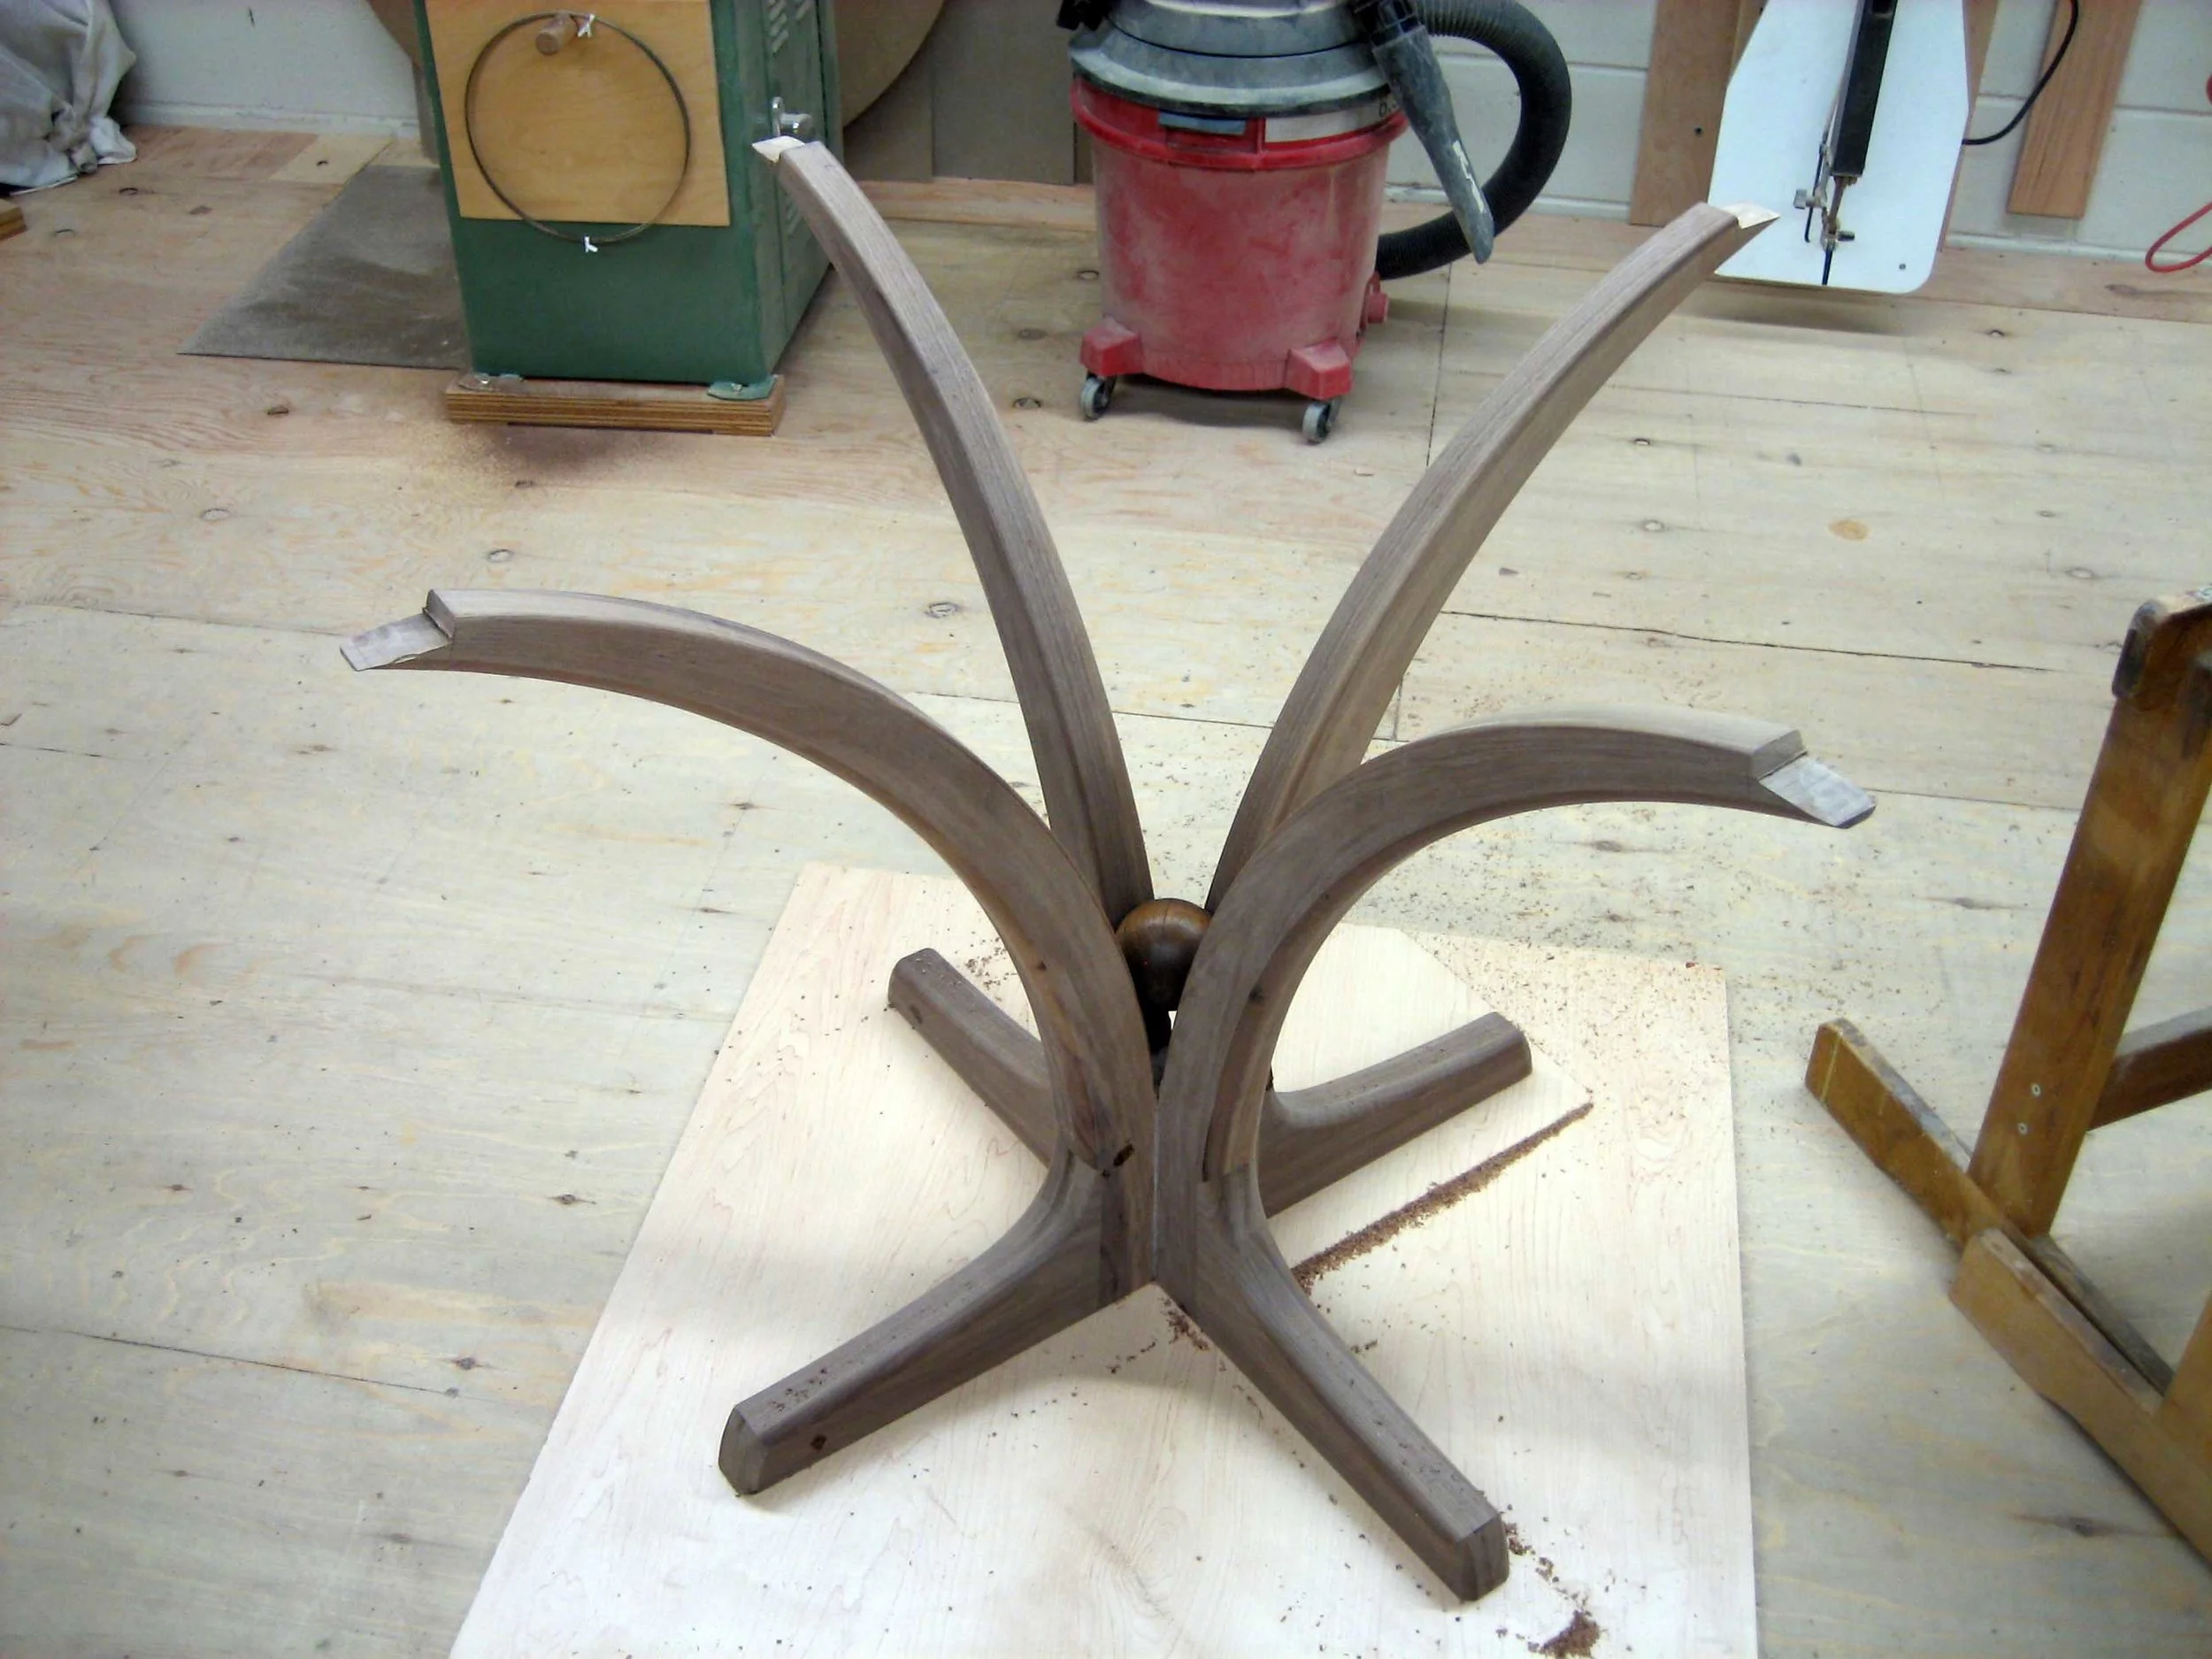
09 – Pairs of legs are chosen and the curves marked out.
10 – A quick look at the evolving shape.
11 – The legs are routed and sanded before the first pair are are glued up.
12 – Easier to glue on the next two upside down so I could keep the assembly level.
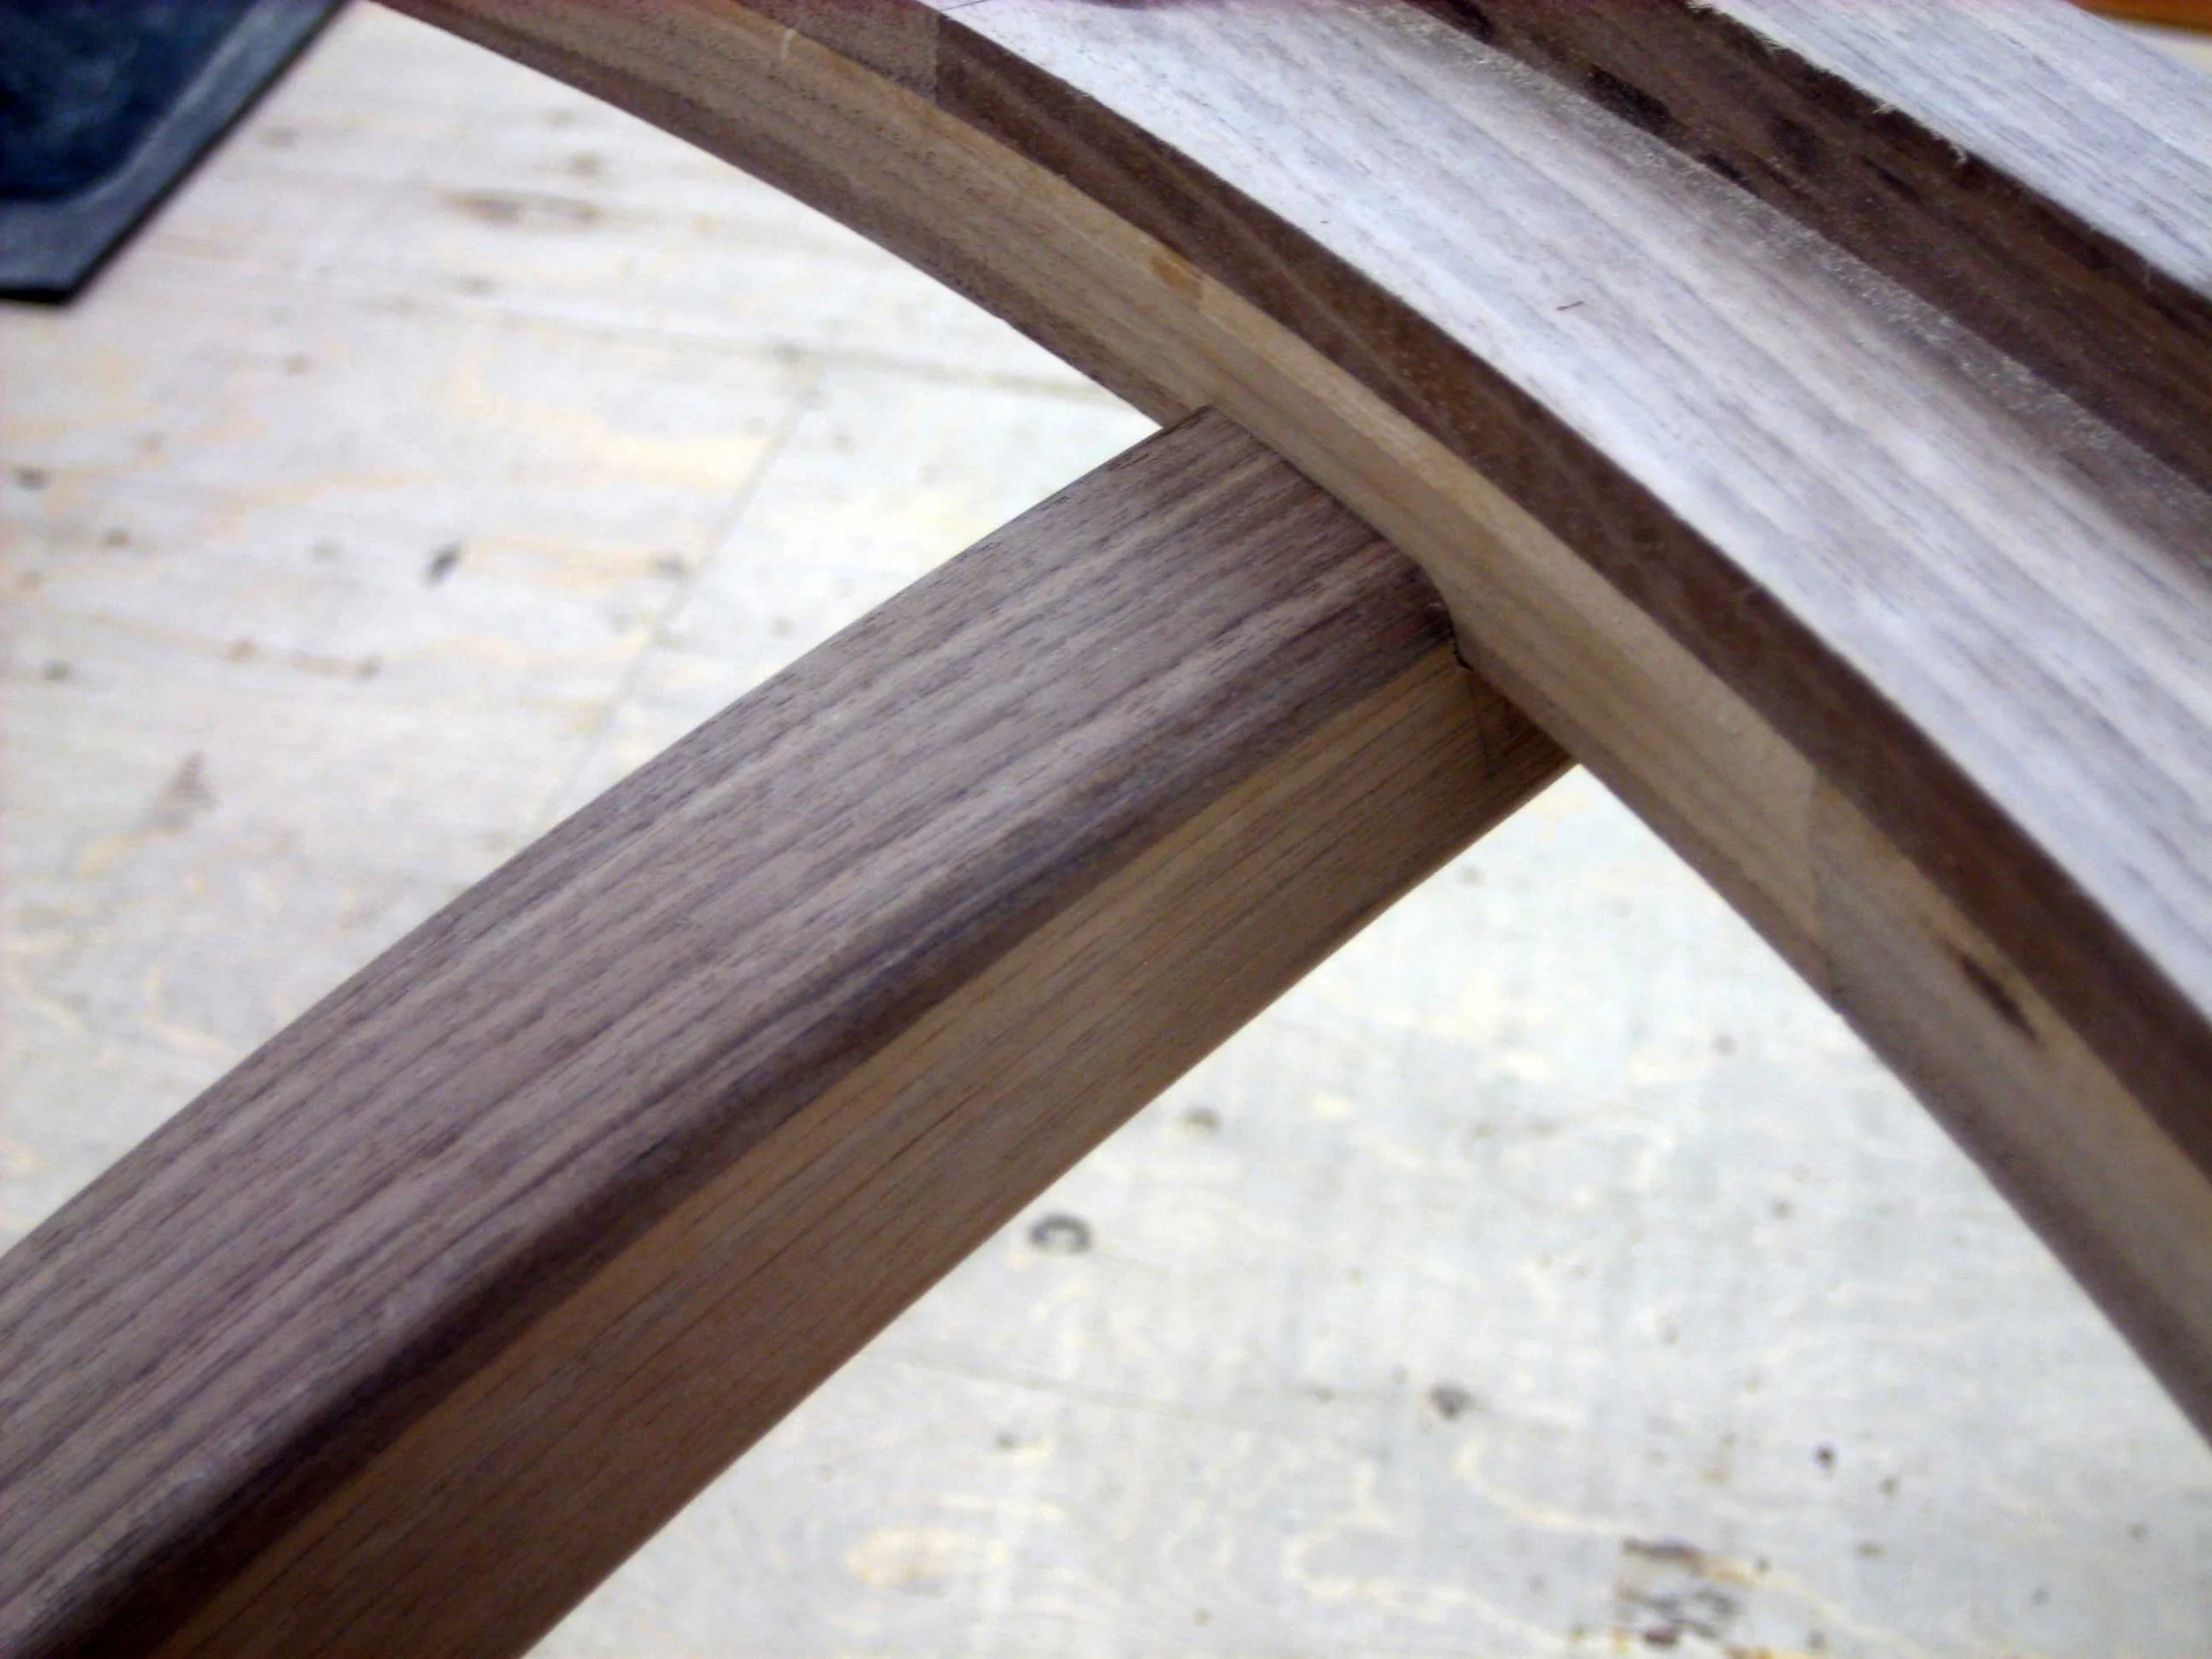
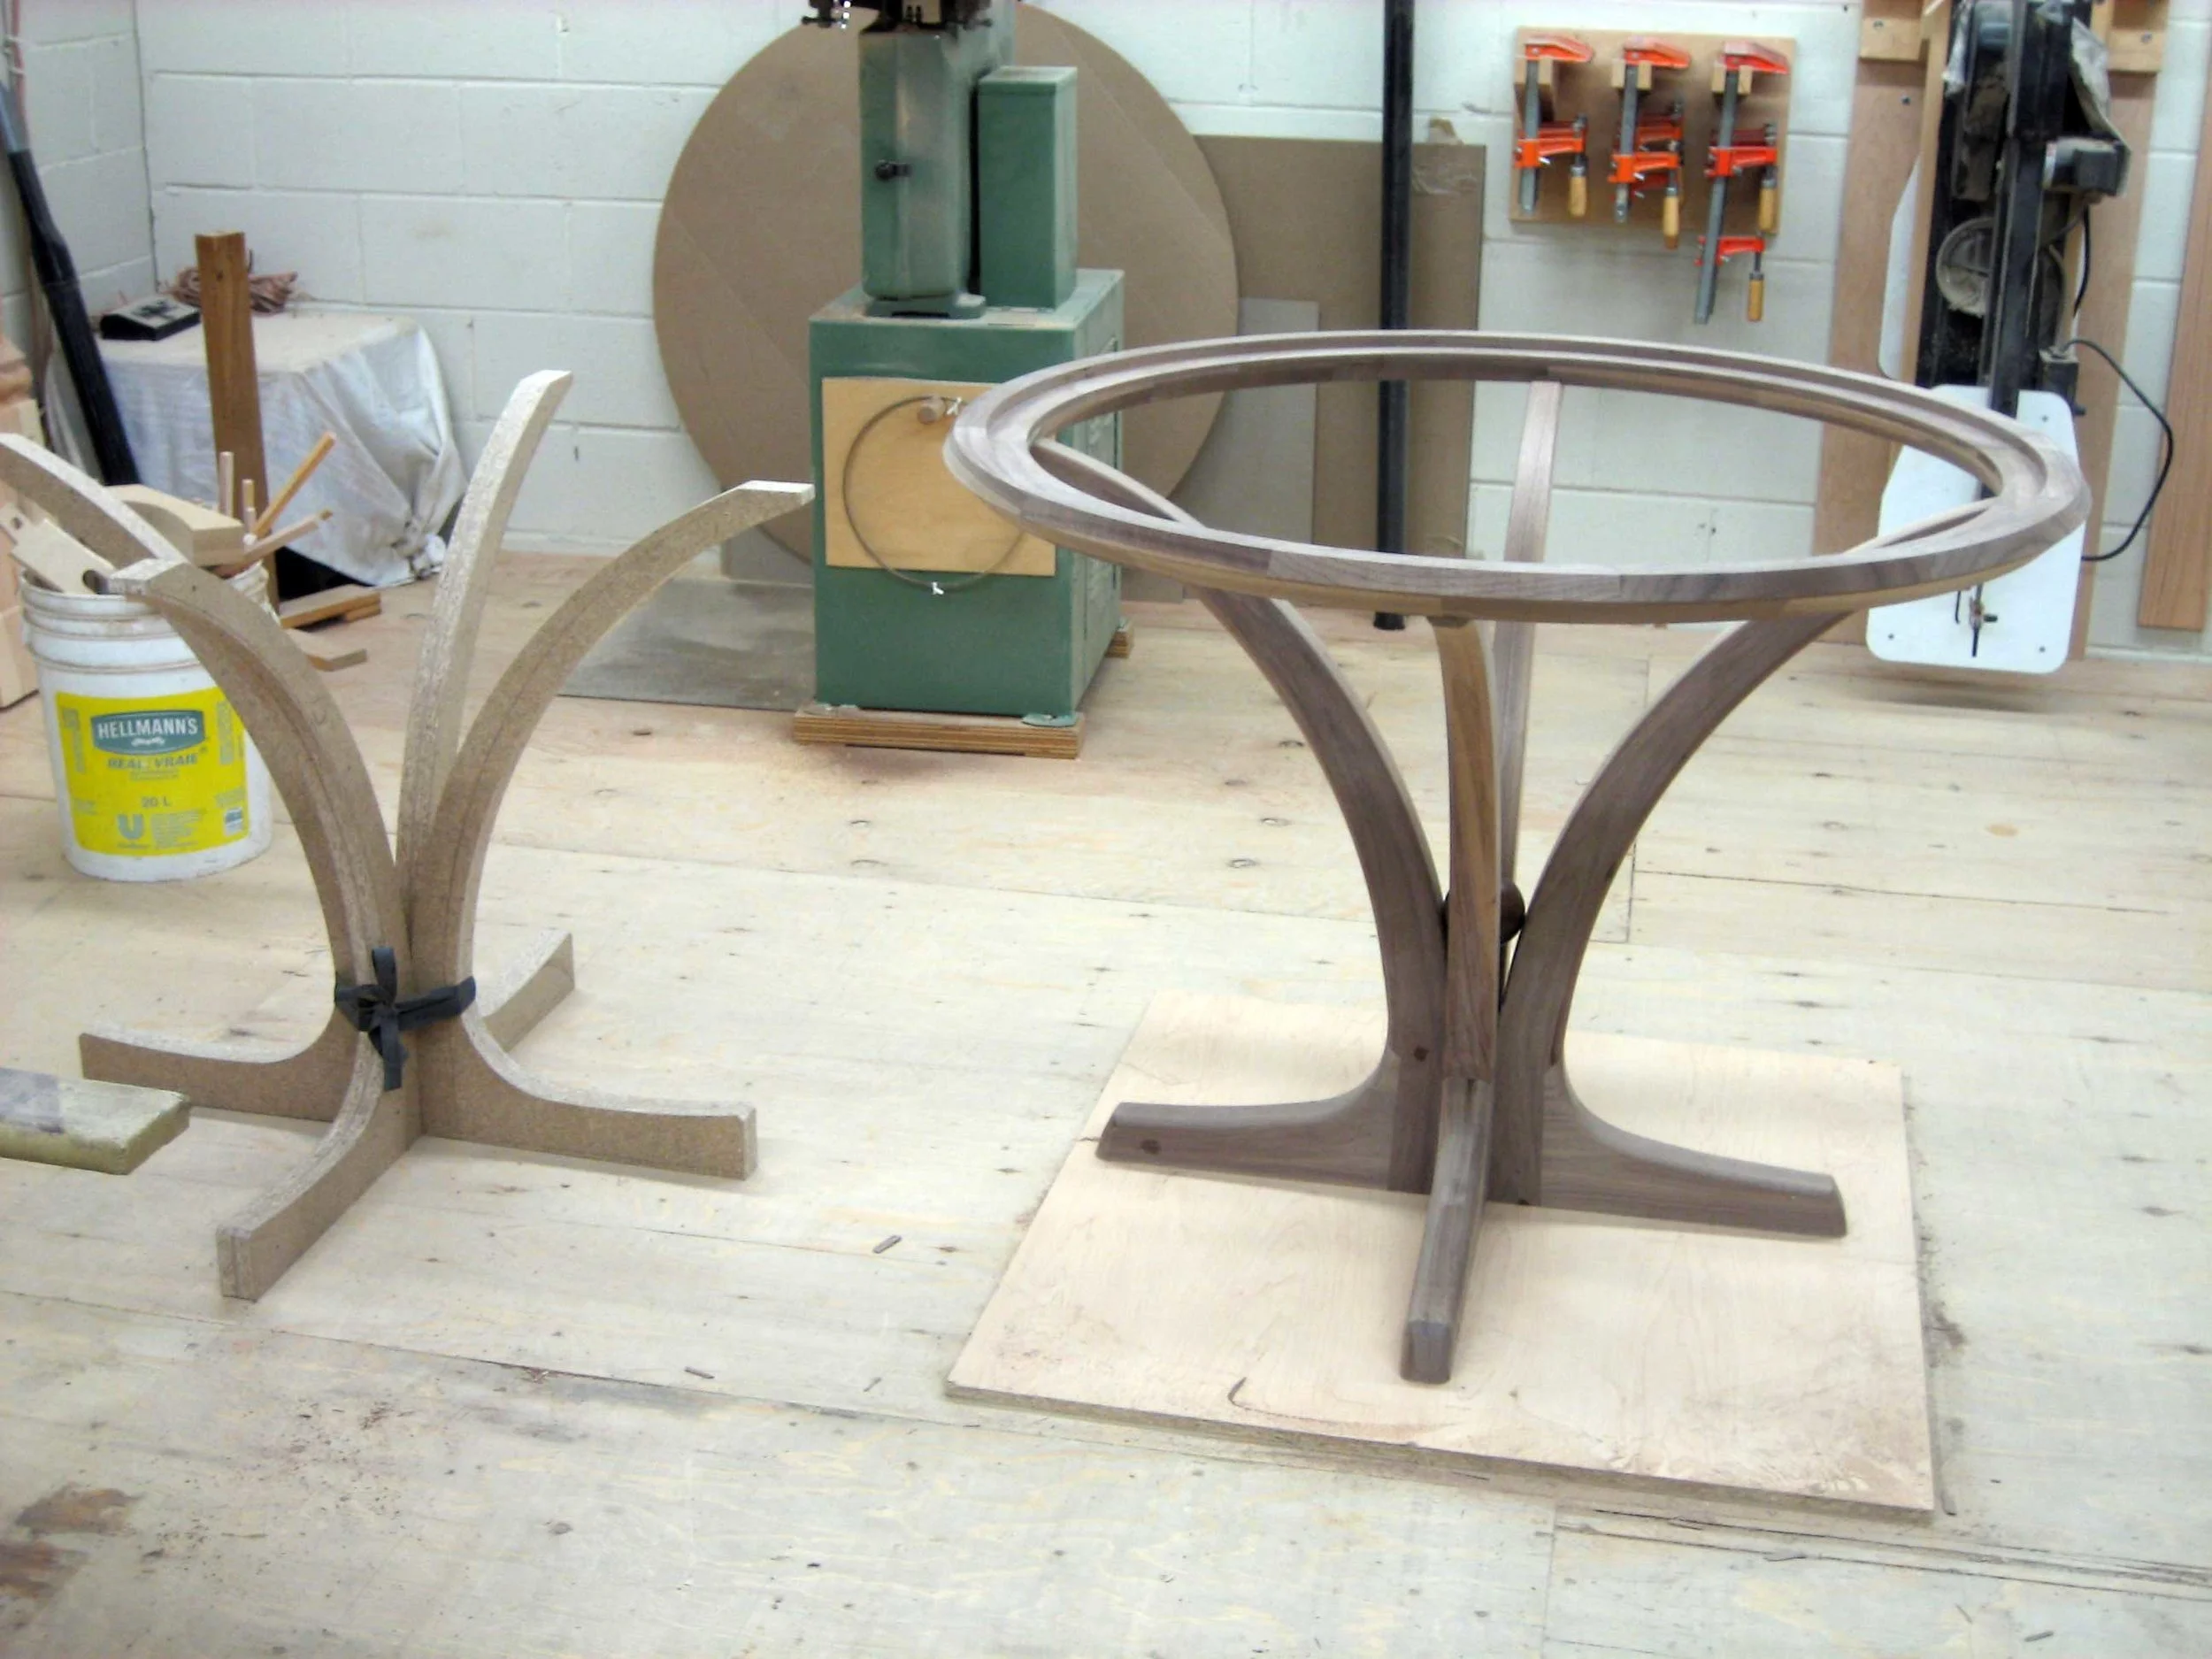
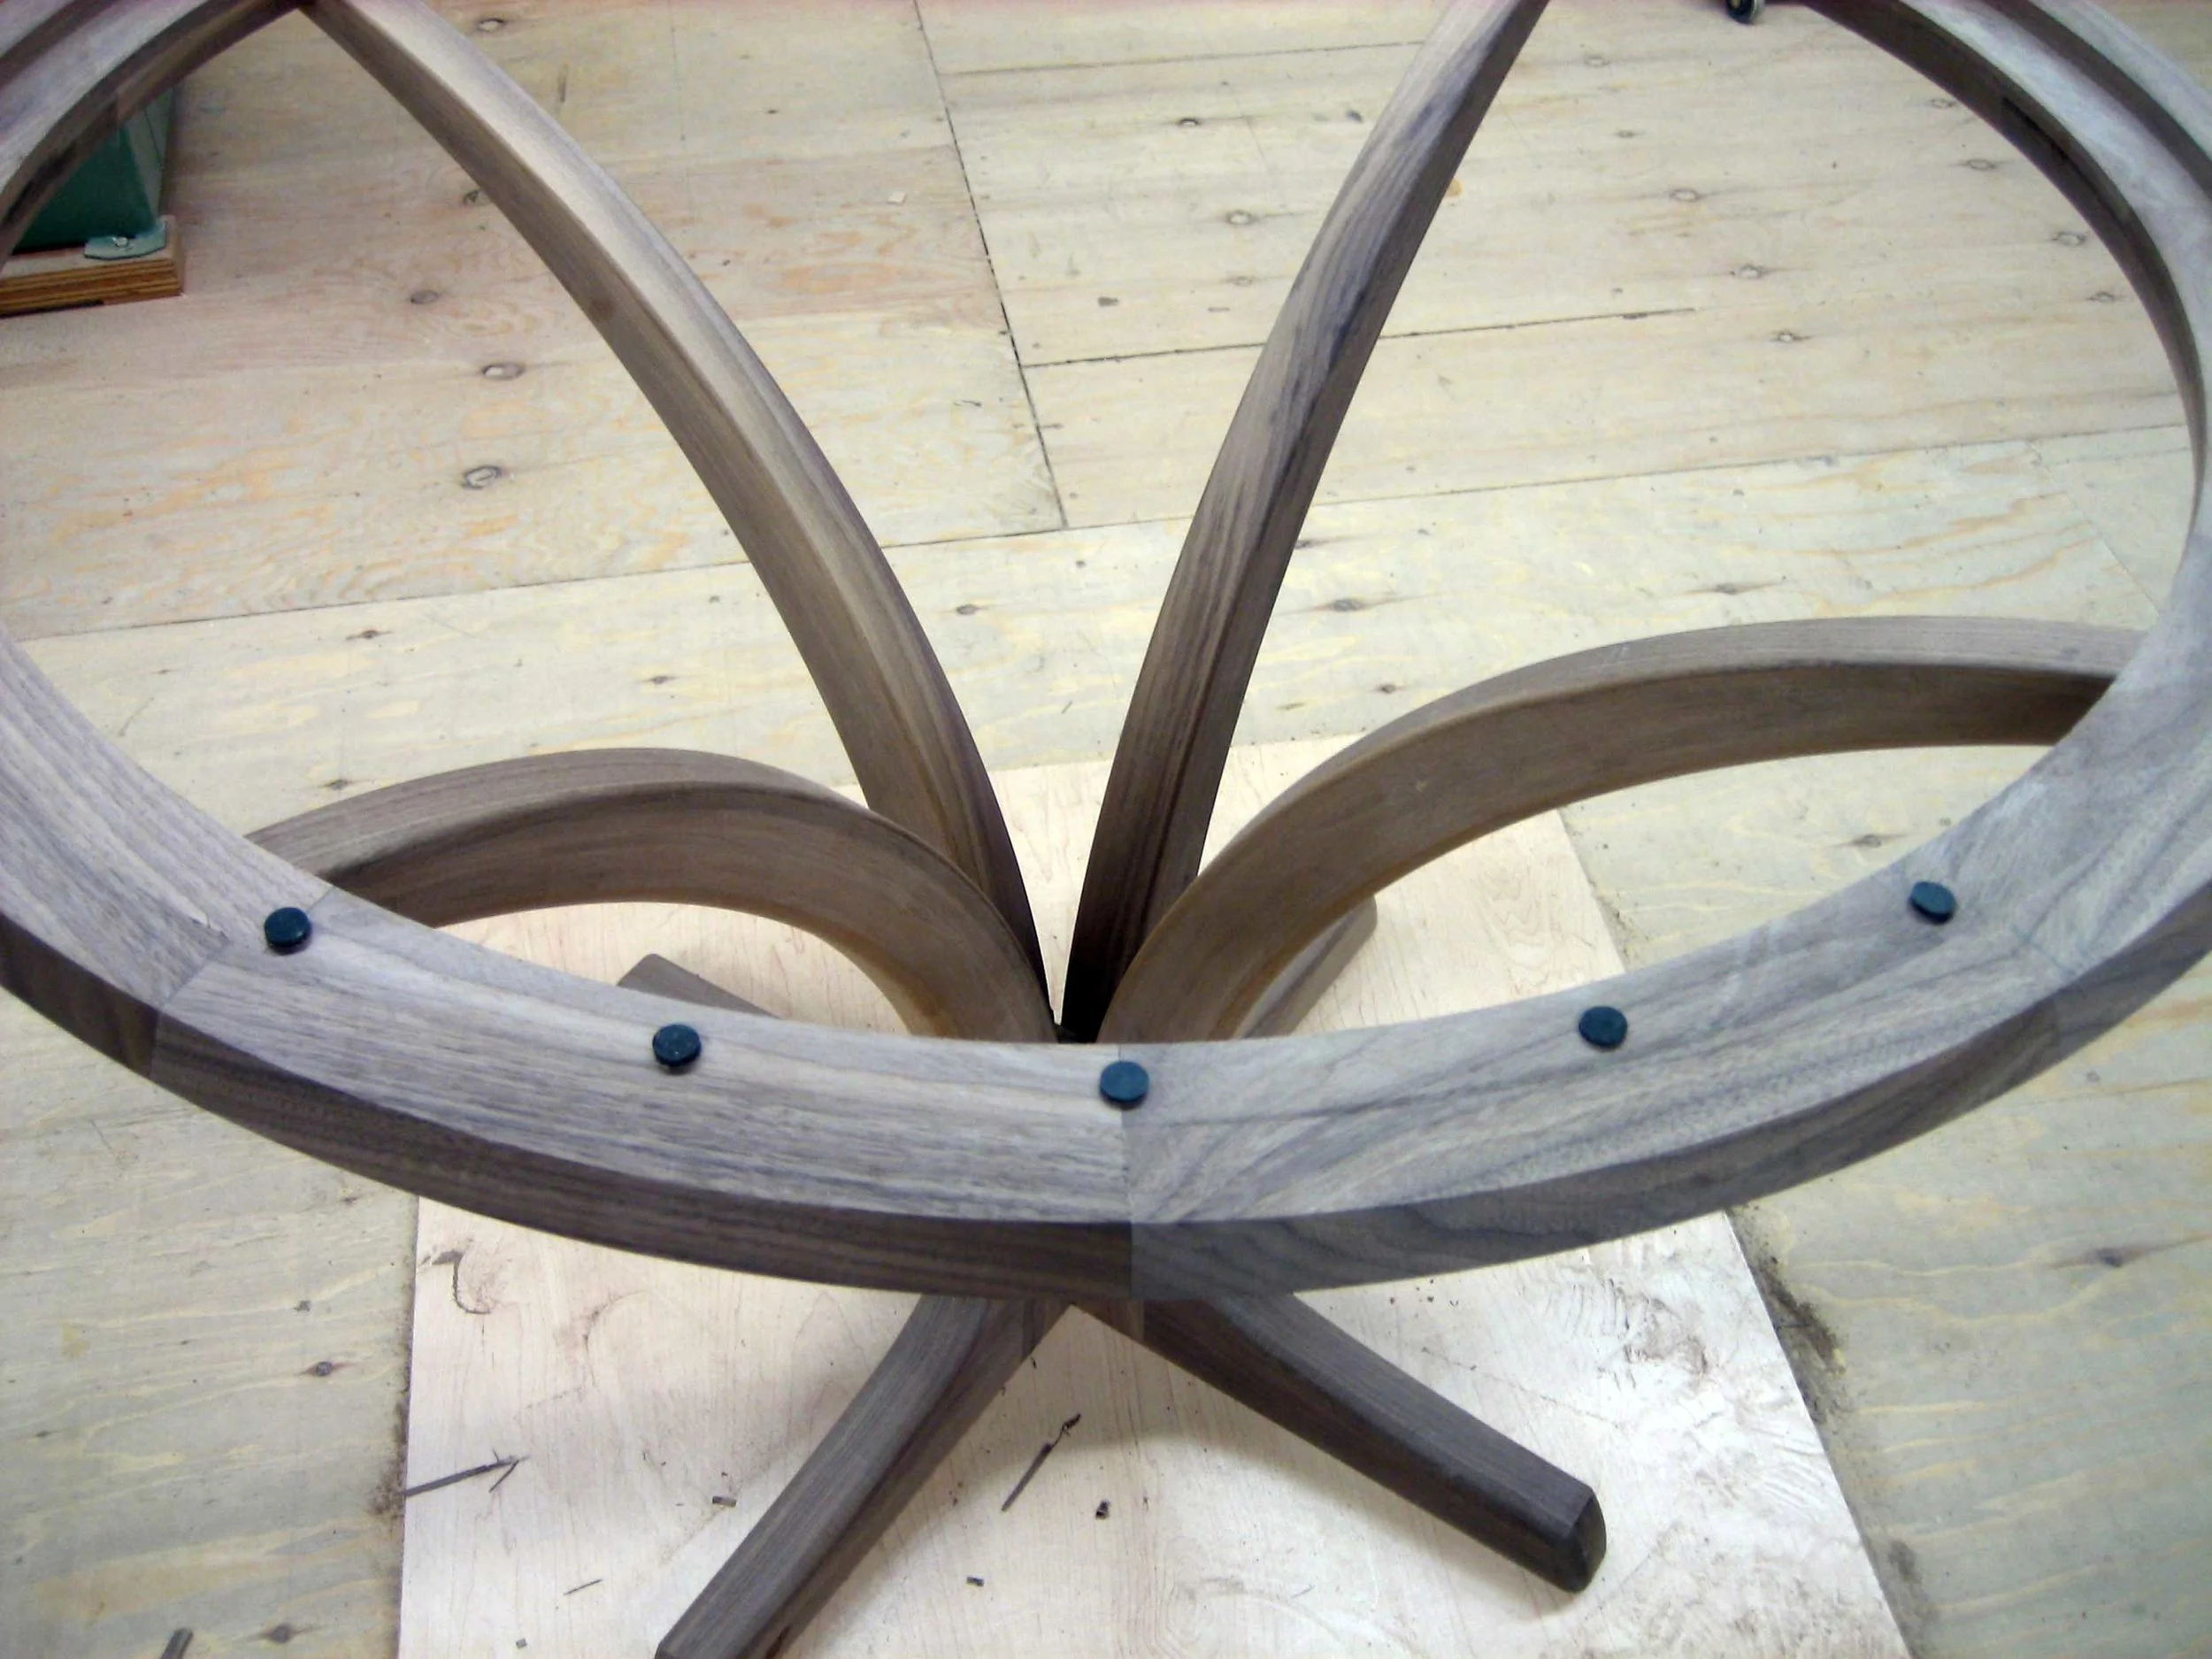
13 – A first look at the rim sitting on the base.
14 – Rough cutting the notches and starting to think about a sphere for the center.
15 – Set up to route the notches clean.
16 – Cleaning up the fit by hand.
17 – A final sanding before assembly.
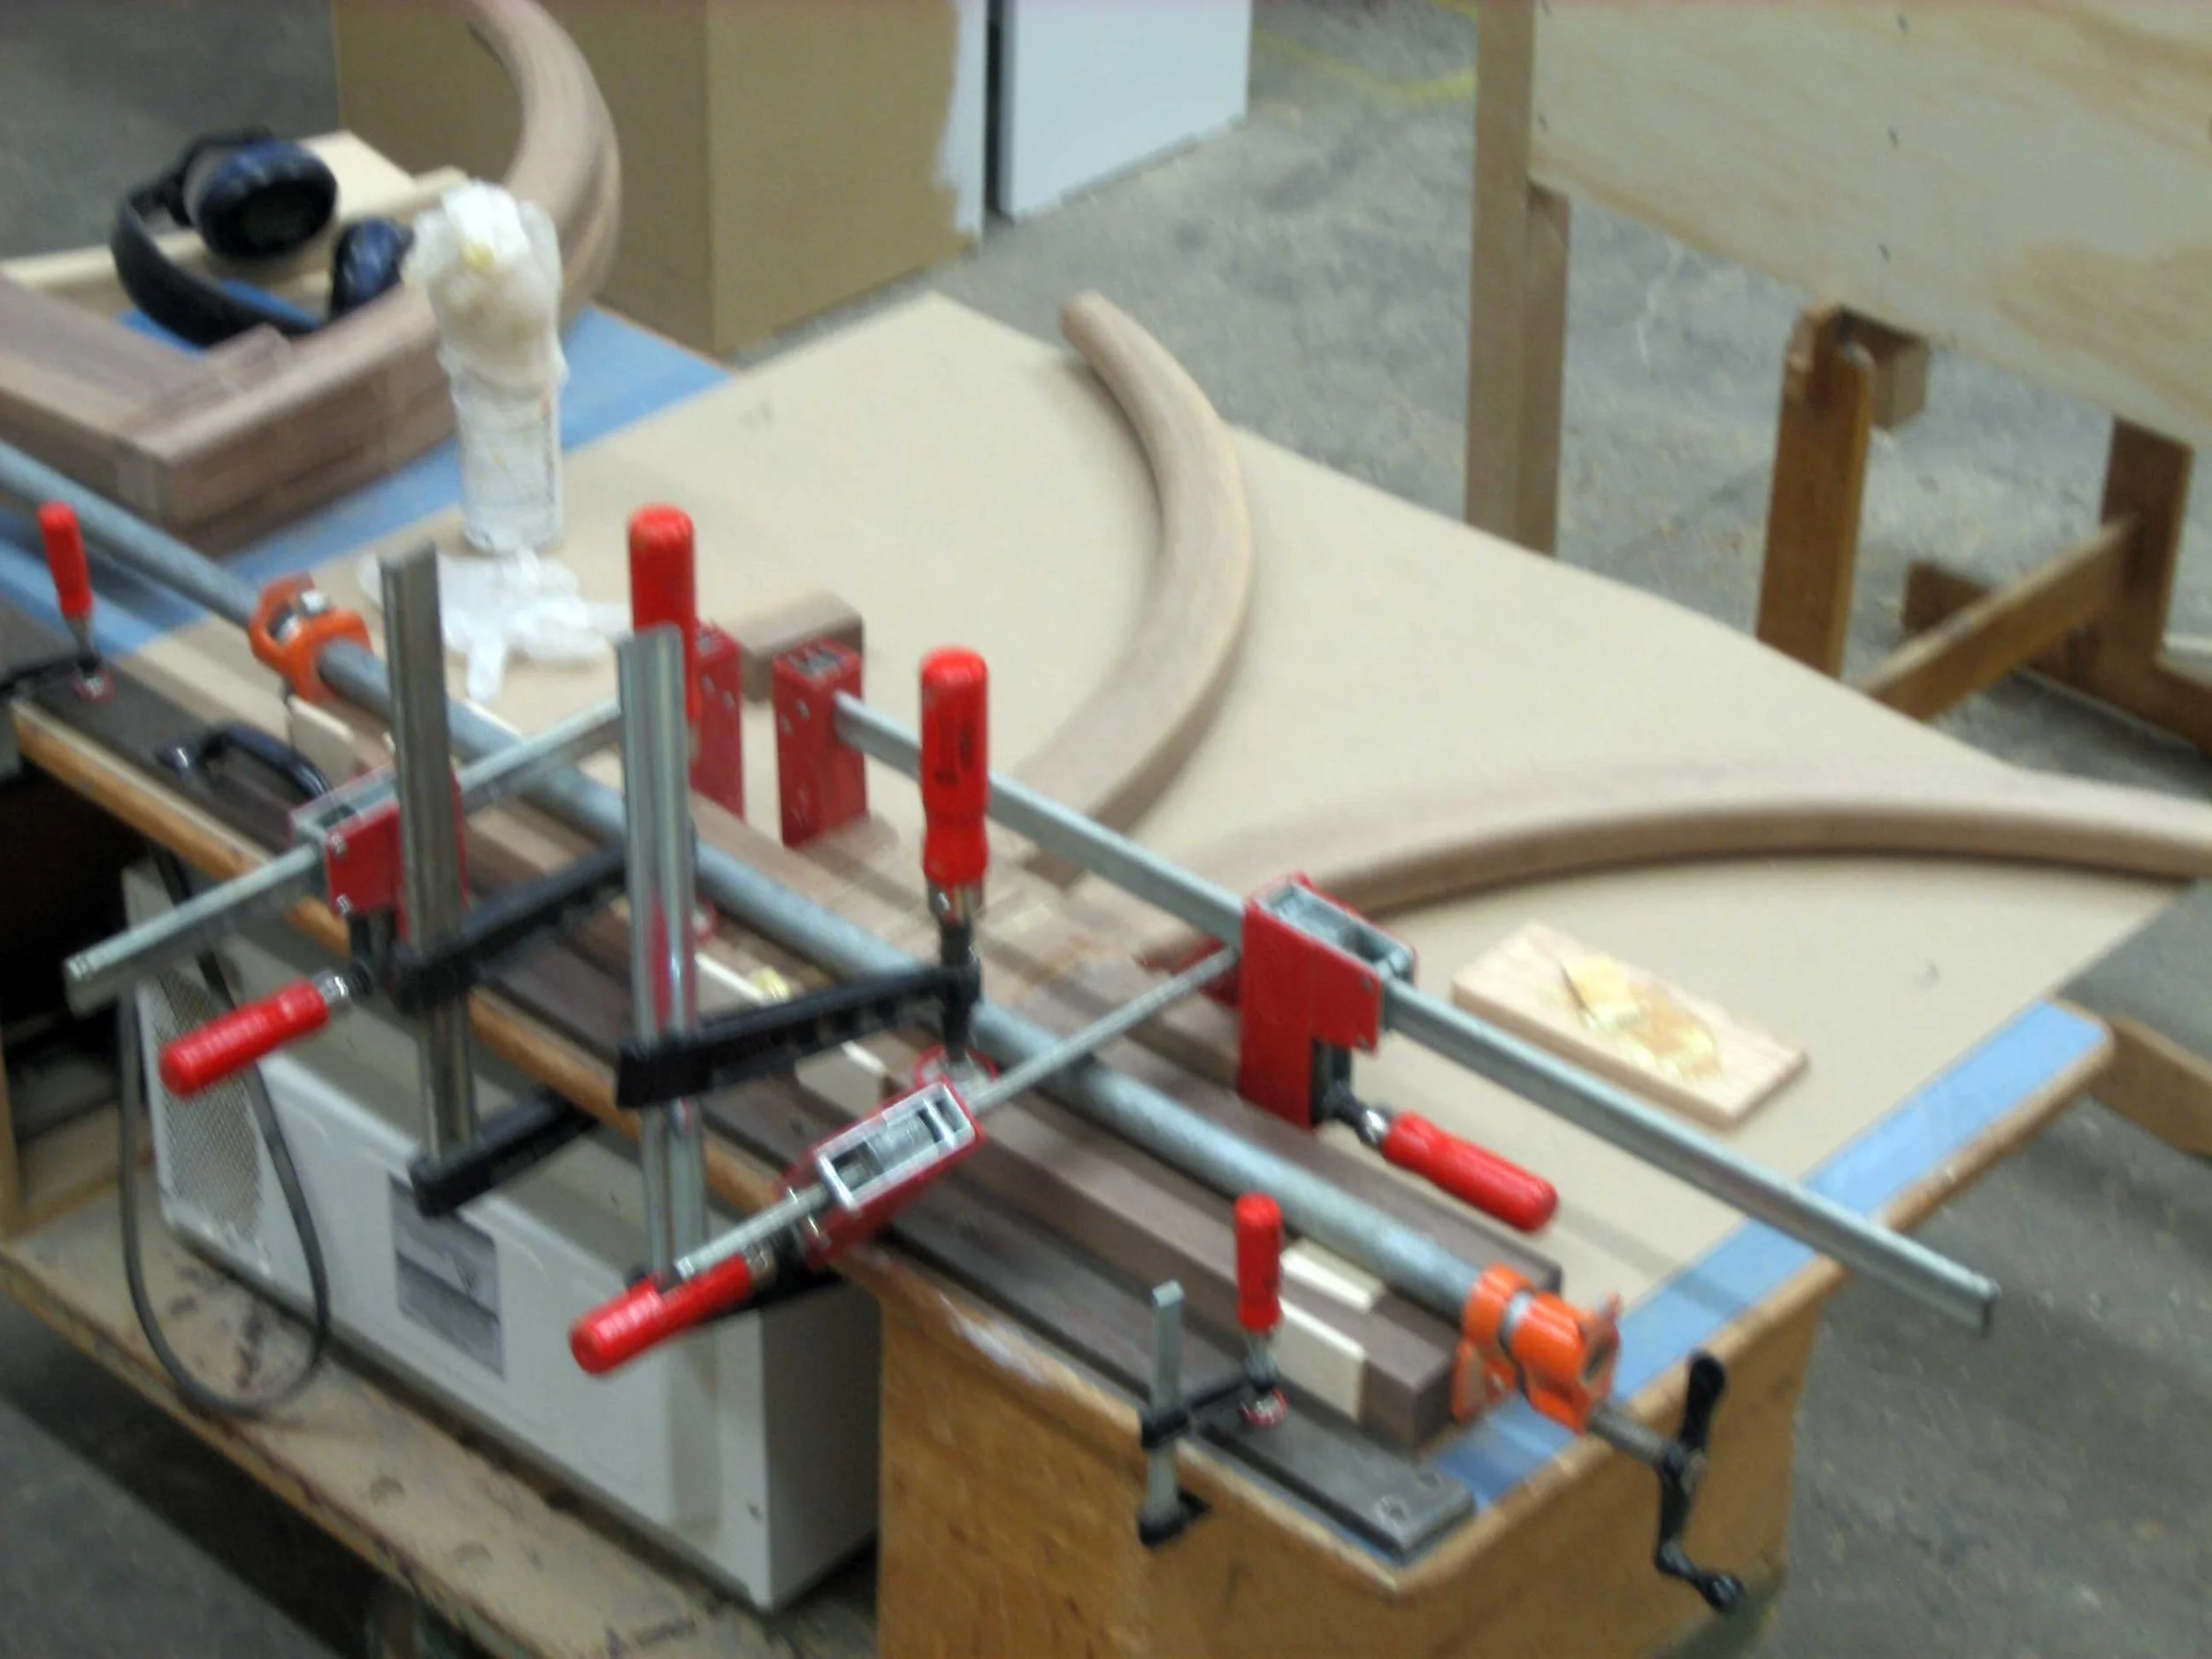
18 – The glue-up using sticks to support the weight of the clamps.
19 – Comparing the table to the initial prototype. Shapes always change along the way.
20 – Deciding on the placement of rubber pads cut with a leather punch along the rim. They will be cut into the surface.
21 – The table before finishing.
22 – The glue–up for a sphere in the center.